
Qoolline eSIM Connection Troubleshooting Guide


Qoolline eSIM Connection Troubleshooting Guide
Qoolline eSIM Connection Troubleshooting Guide
If your Qoolline eSIM shows as connected but you aren’t getting Internet access on 4G LTE or 5G, it could be due to several reasons. Below are common issues you might experience:
• Slow download/upload speeds
• “E” (Edge) in the signal status instead of 4G LTE or 5G
• No Internet connection despite showing a network connection
Please follow the steps below to troubleshoot these issues.
IMPORTANT: DO NOT DELETE YOUR eSIM
If your eSIM isn’t working, follow these steps or contact Qoolline support for help. Deleting your eSIM may result in needing to reconfigure your service.
1. Are You in the eSIM Service Area?
• Your Qoolline eSIM will only connect in the purchased destination.
For example, a USA eSIM will only work in the USA.
• You can install the eSIM on your device anytime, but it won’t connect to a network until you arrive in the appropriate service area.
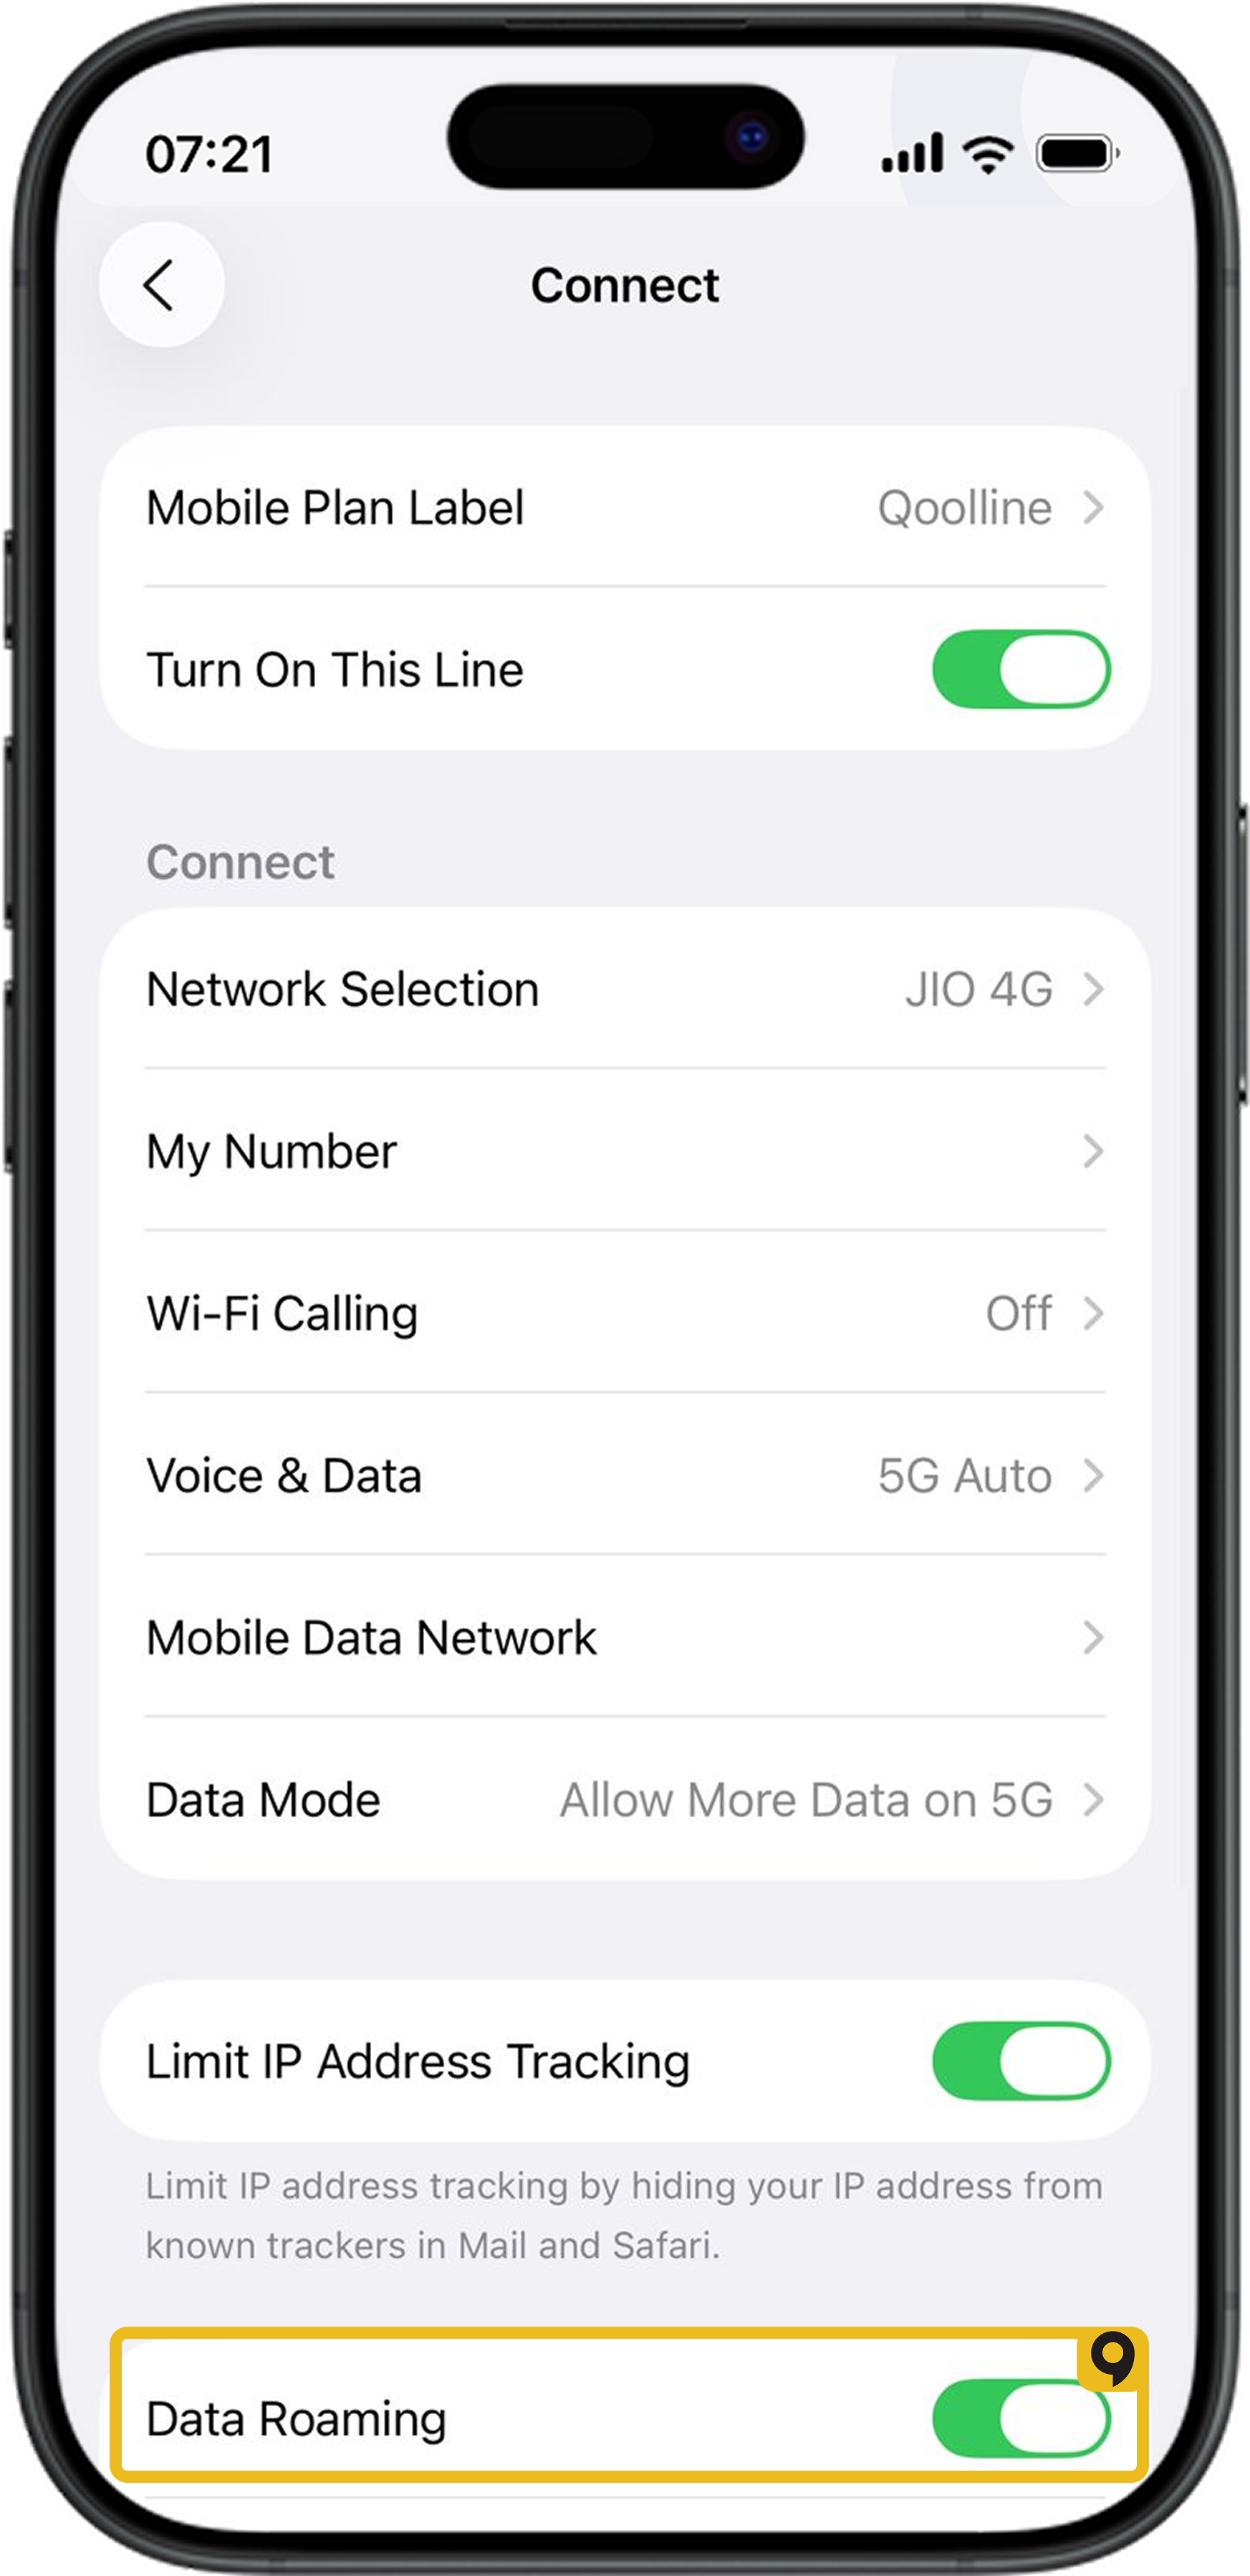
2. Enable Data Roaming
Data roaming must be enabled for the eSIM to connect to the network.
• iPhone / iPad (iOS):
1. Go to Settings > Cellular.
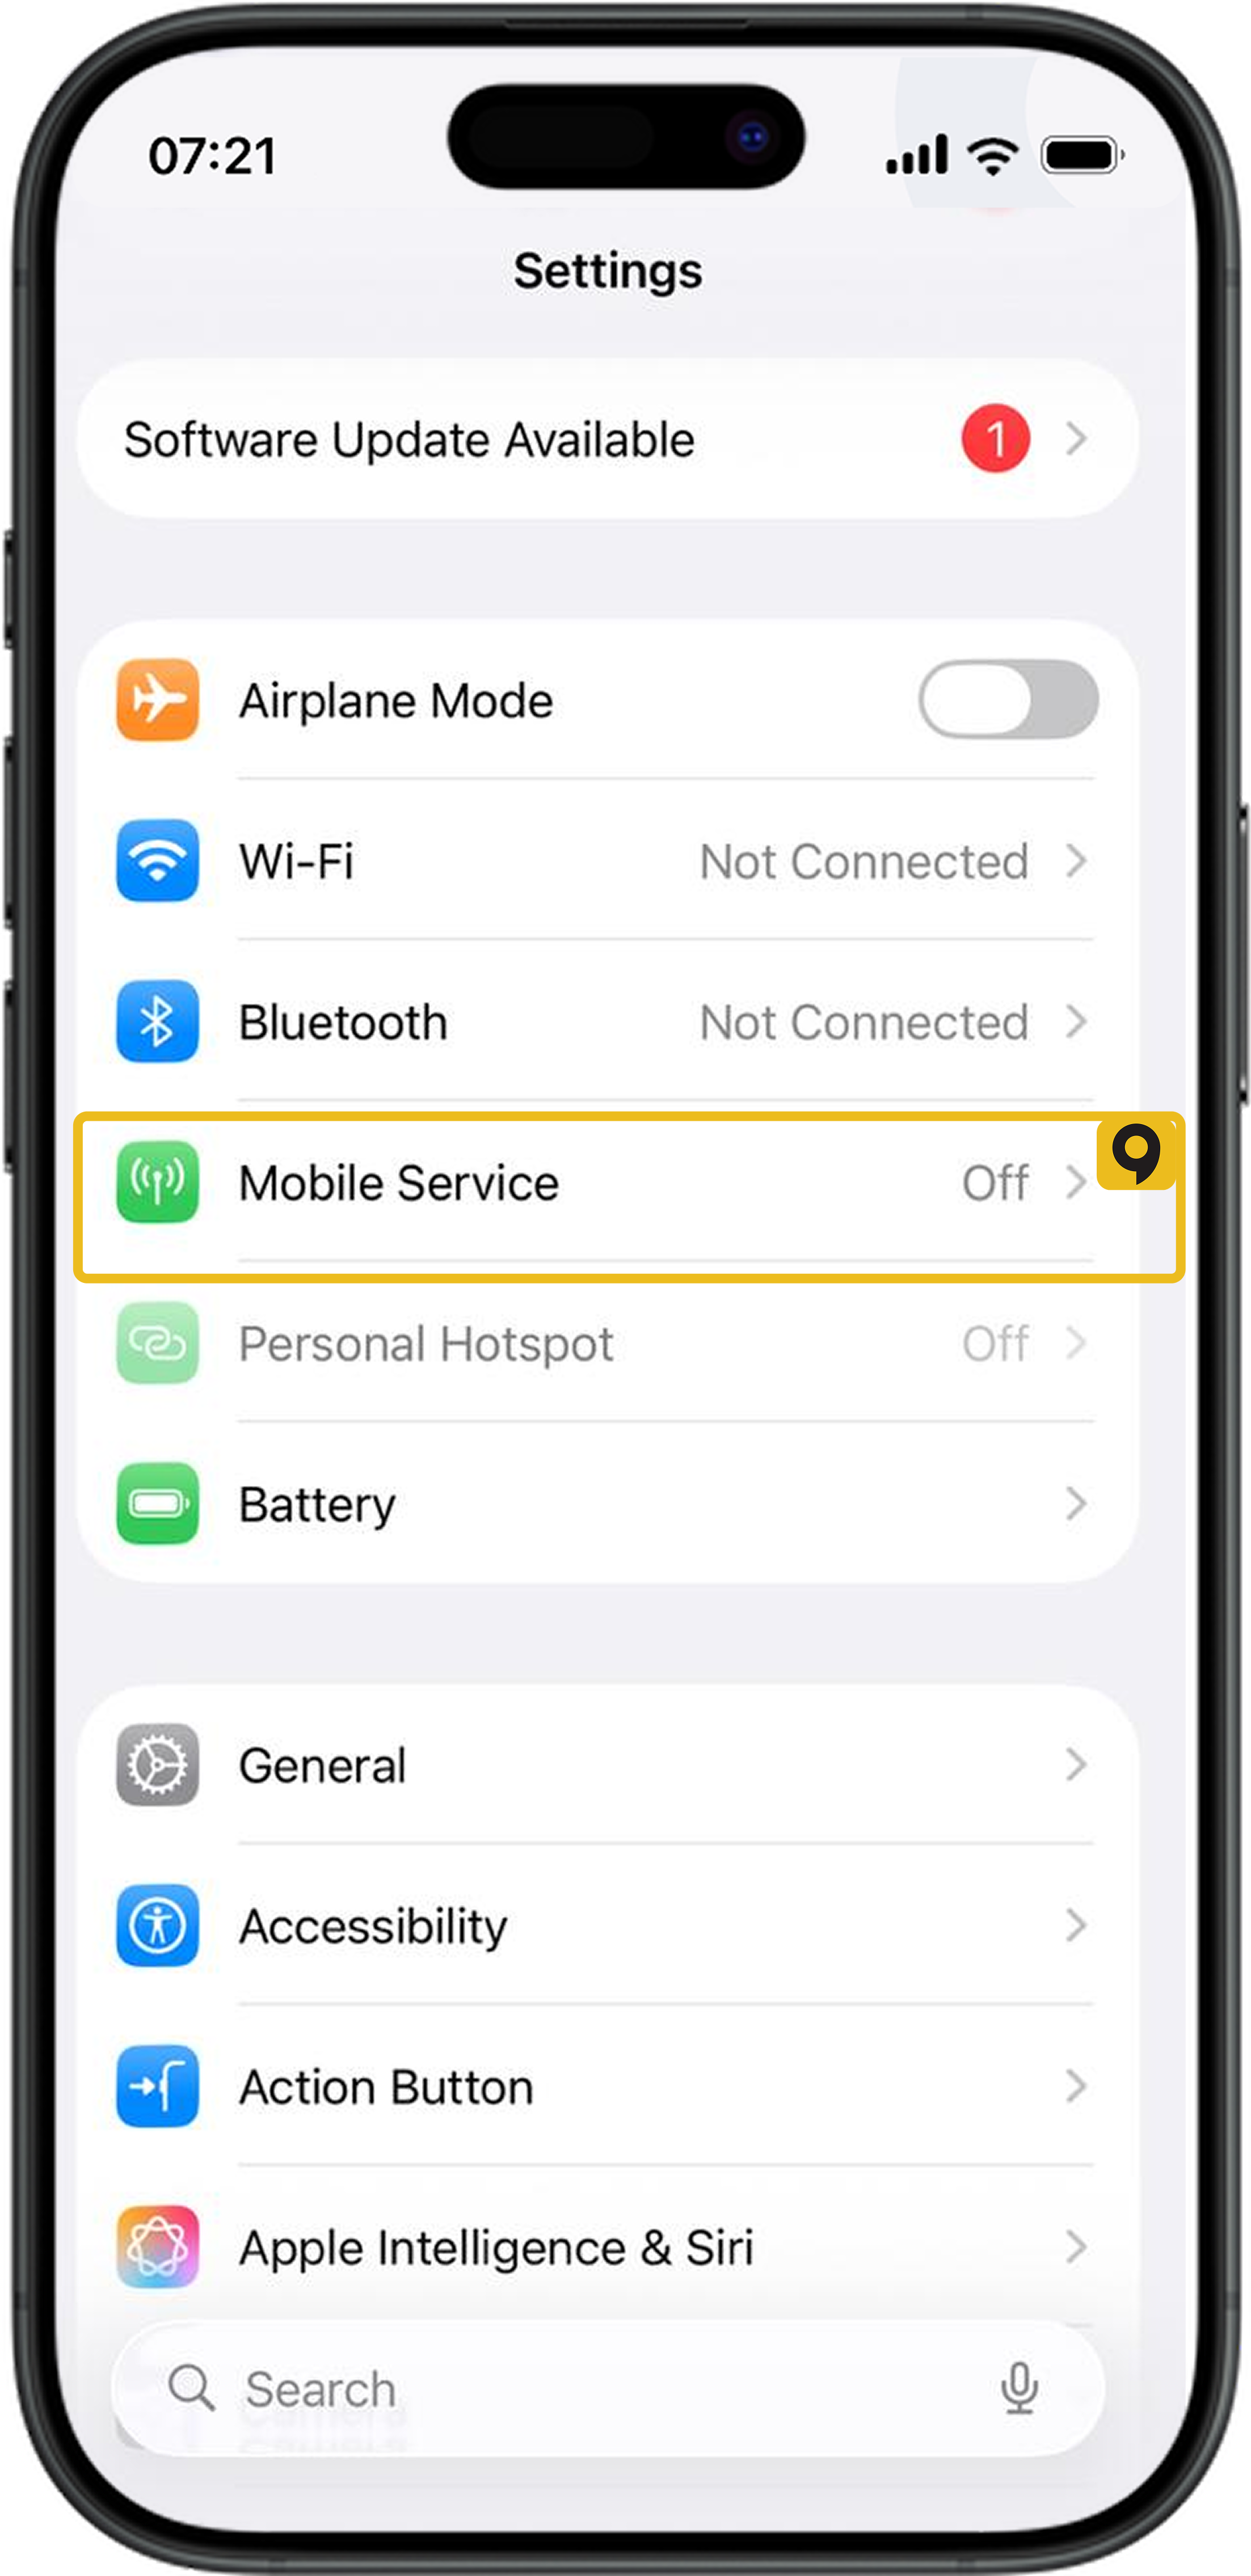
2. Select your eSIM plan under Cellular Plans (e.g., “Secondary” or “Personal”).
3. Ensure “Turn On This Line” is toggled ON.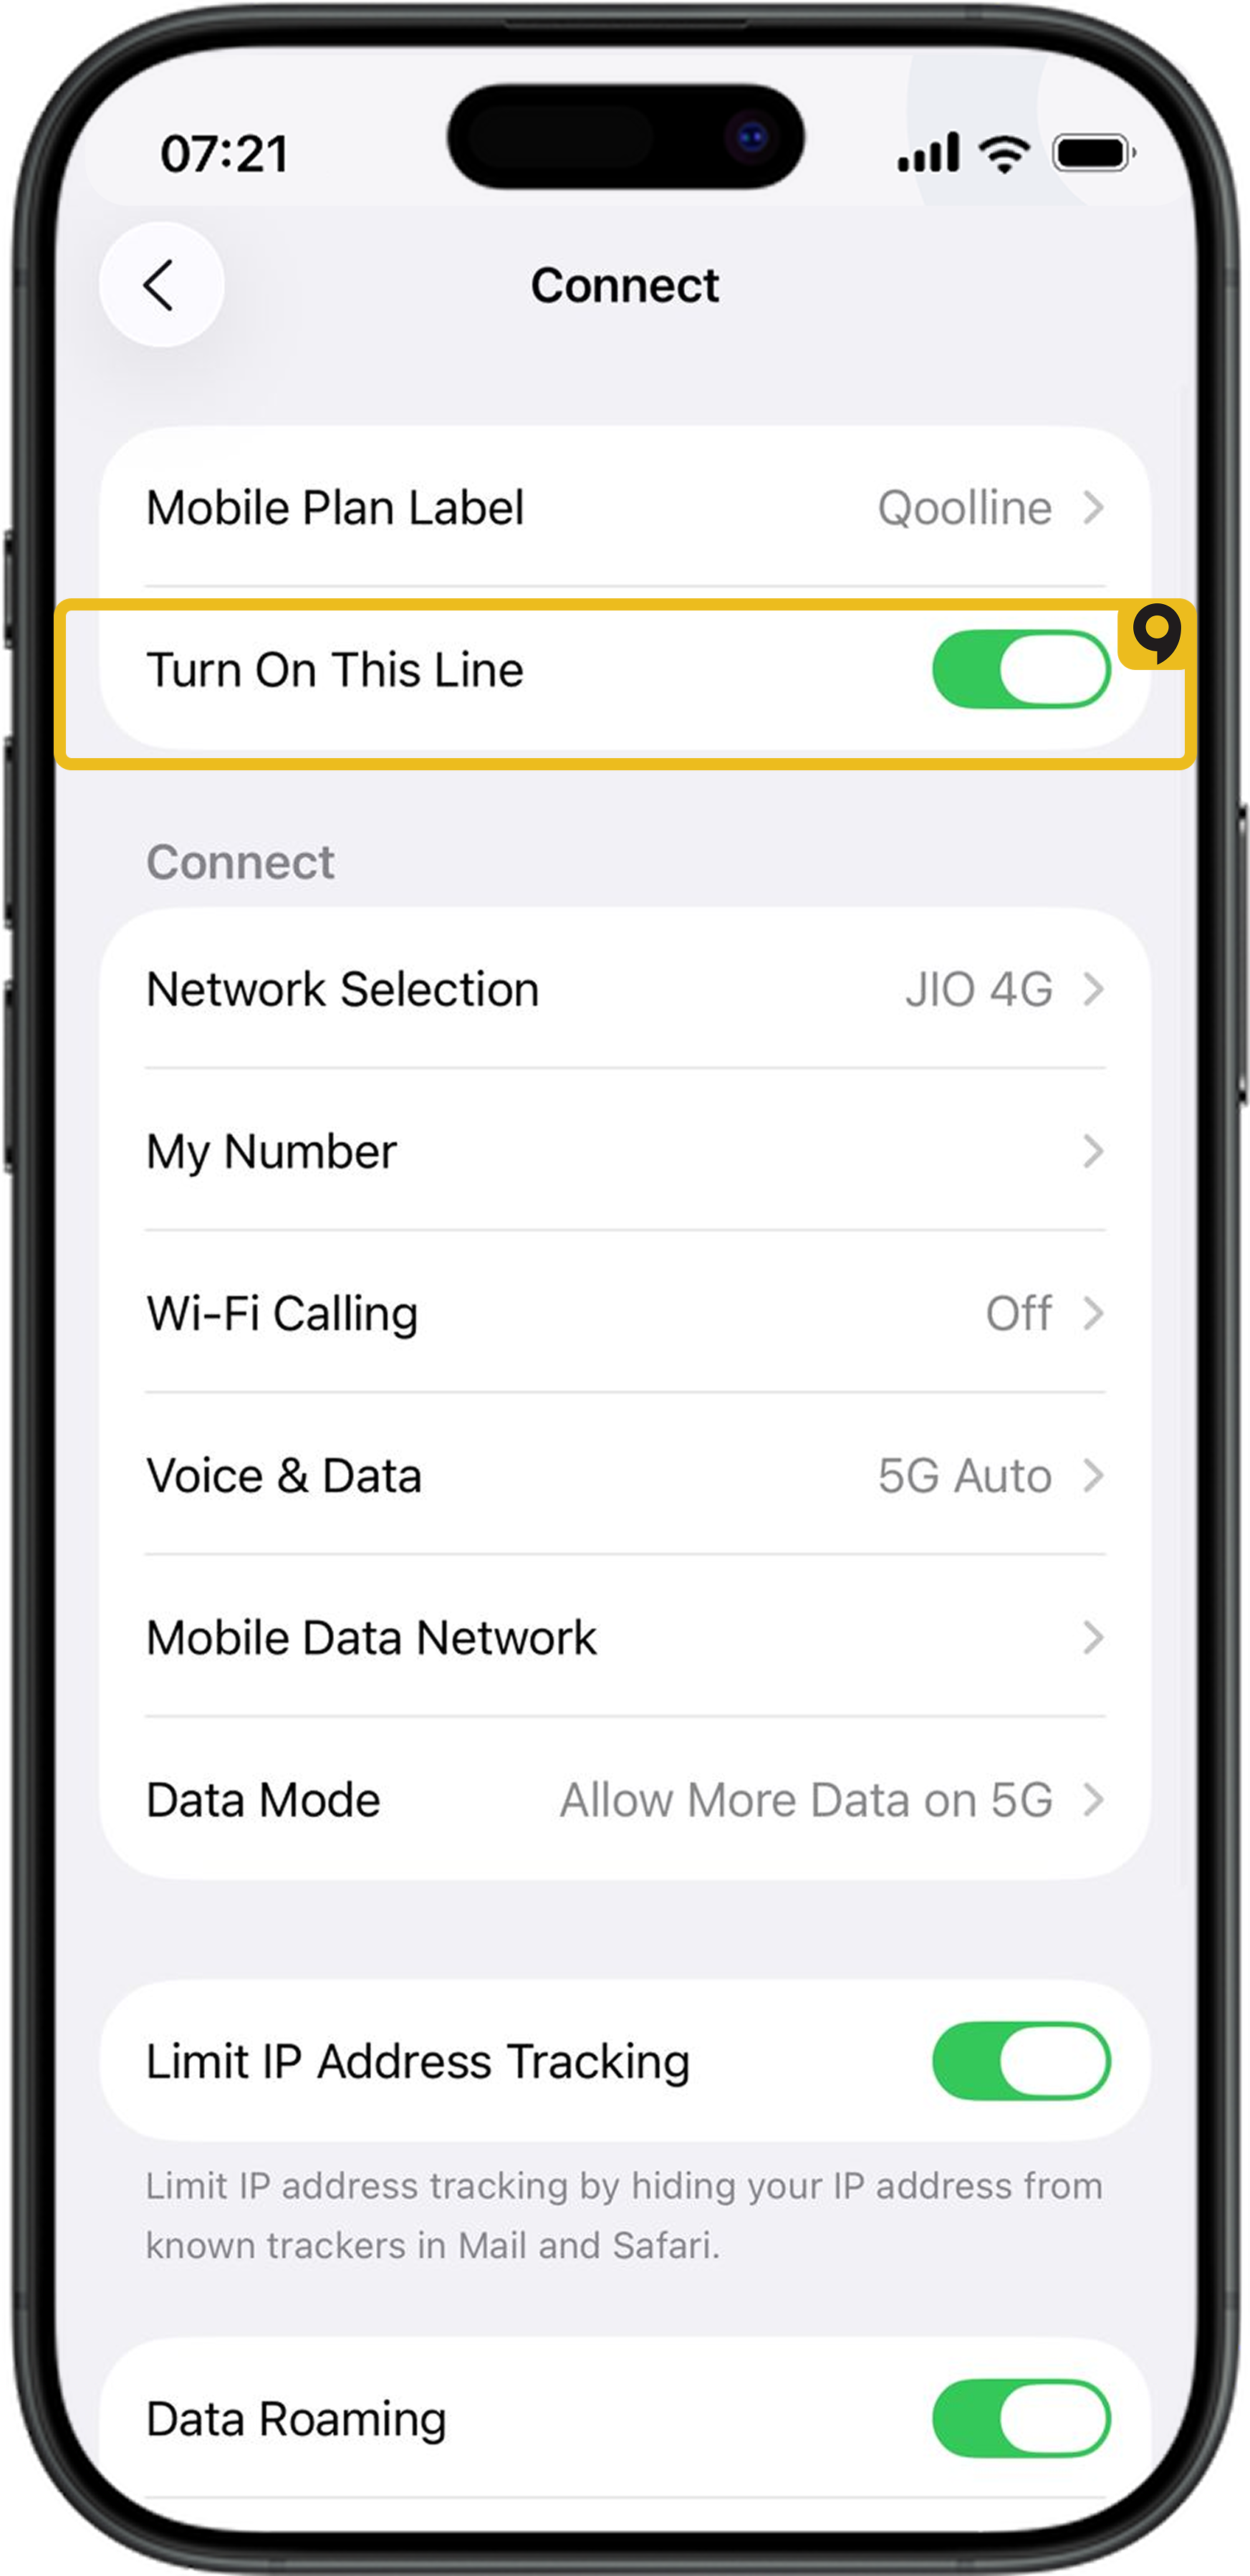
4. Enable Data Roaming.
• Samsung Galaxy (Android):
1. Open Settings > Connections.
2. Tap Mobile Networks.
3. Ensure Data Roaming is toggled ON.
• Google Pixel (Android):
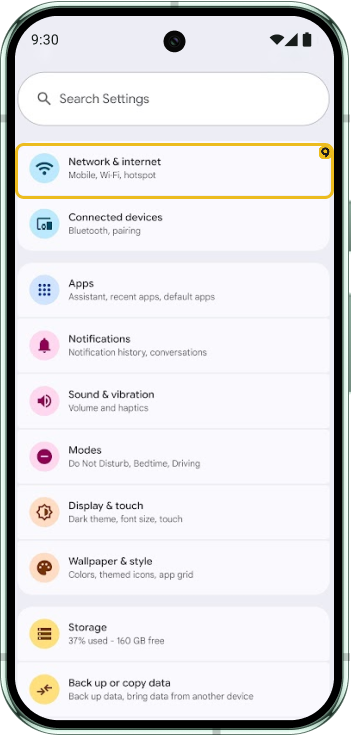
1. Open Settings > Network & Internet.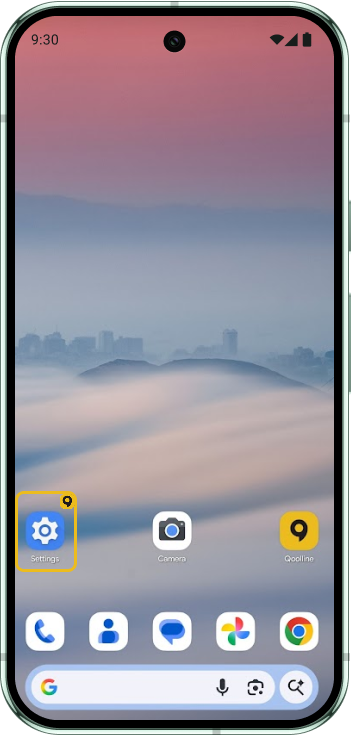
2. Tap SIMs and select your eSIM plan.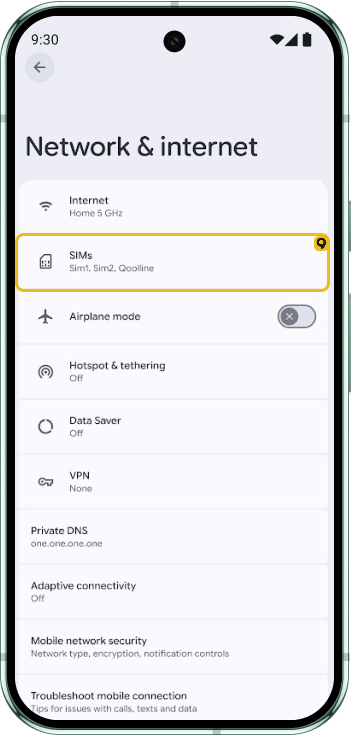
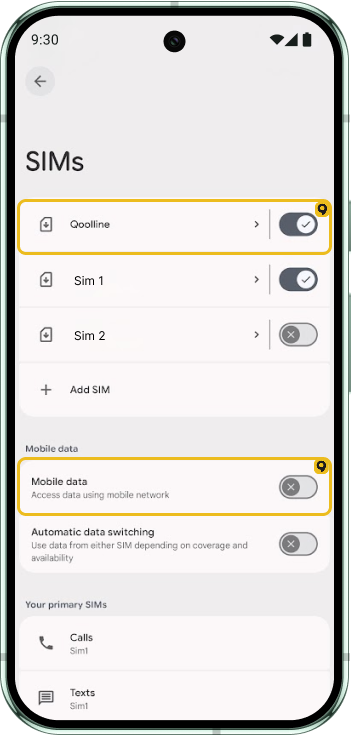
3. Enable Data Roaming and Mobile Data.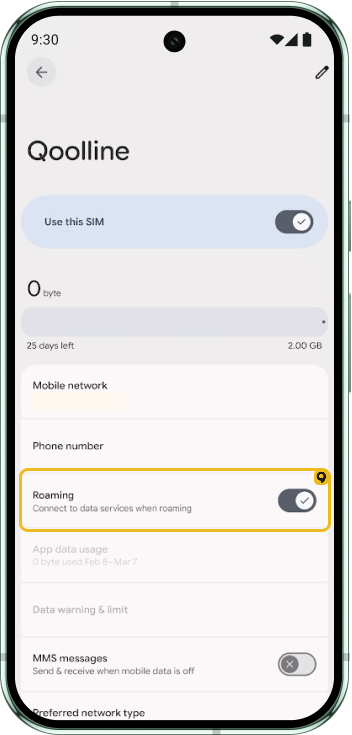
3. Set Your Device to Use the eSIM for Mobile Data
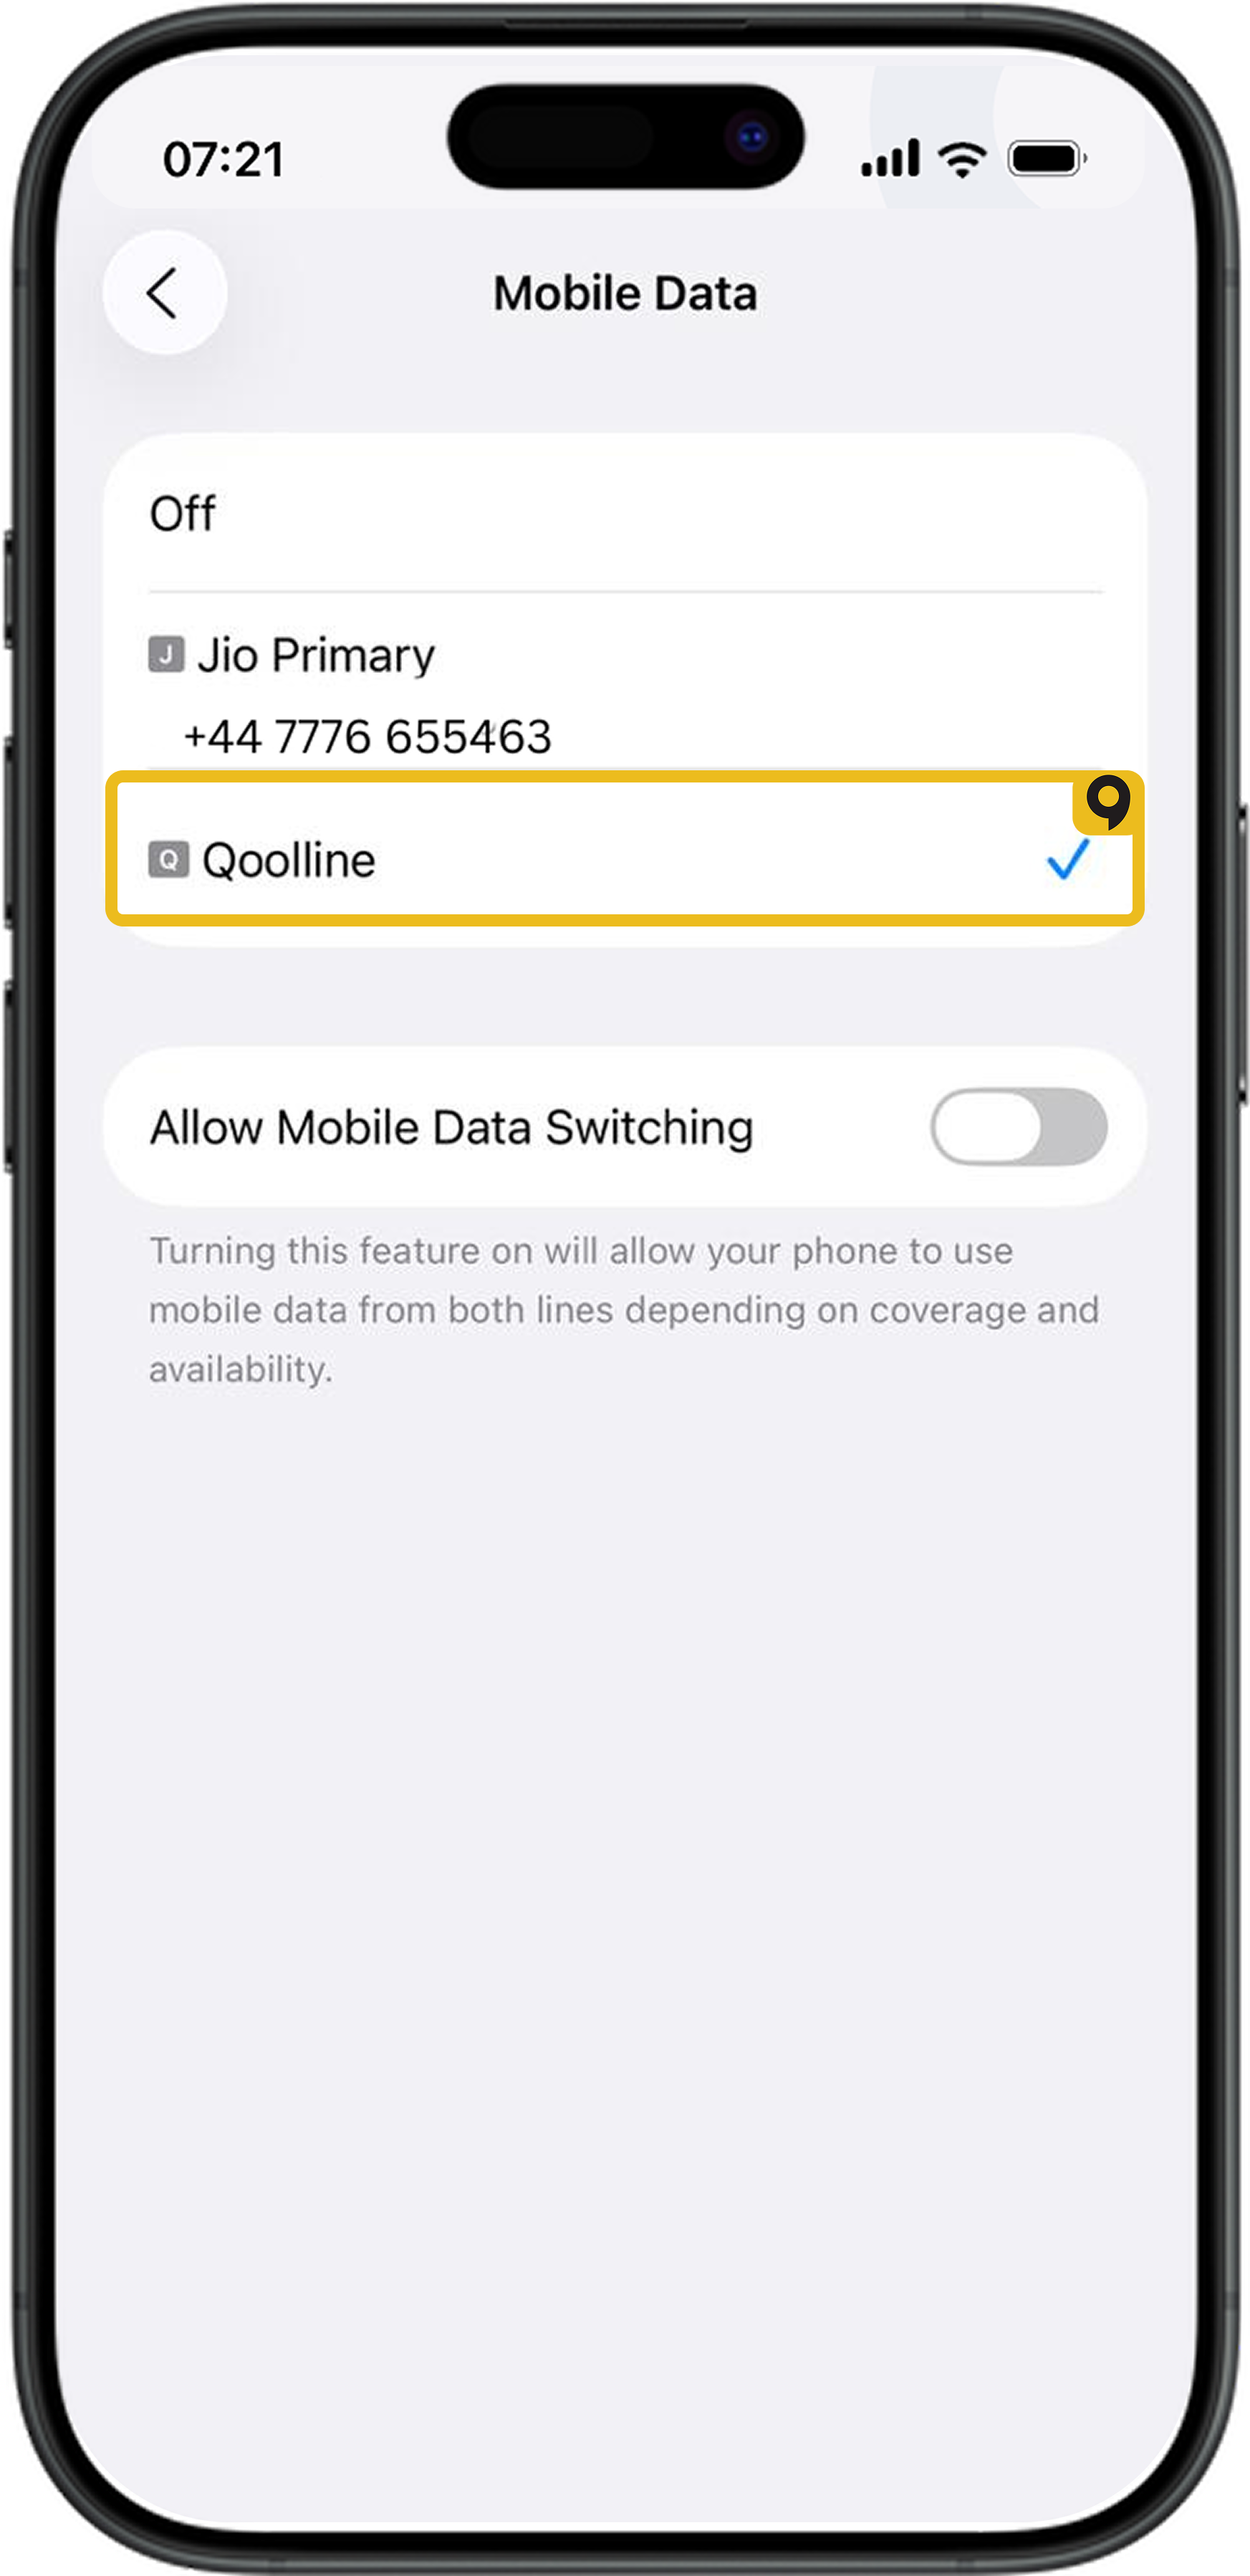
• Apple iOS (iPhone):
1. Go to Settings > Cellular.
2. Tap Cellular Data at the top.
3. Select your eSIM plan (e.g., “Secondary” or “Personal”).
• Samsung Galaxy (Android):
1. Open Settings > Connections.
2. Tap SIM Card Manager.
3. Select your eSIM plan for Mobile Data.
• Google Pixel (Android):
1. Open Settings > Network & Internet.
2. Tap SIMs and select your eSIM plan for data.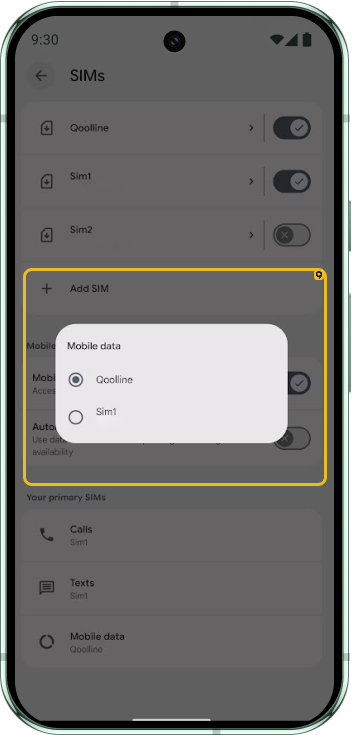
4. (Android Only) Configure APN Settings
If your eSIM isn’t providing a data connection on Android, try configuring the APN settings.
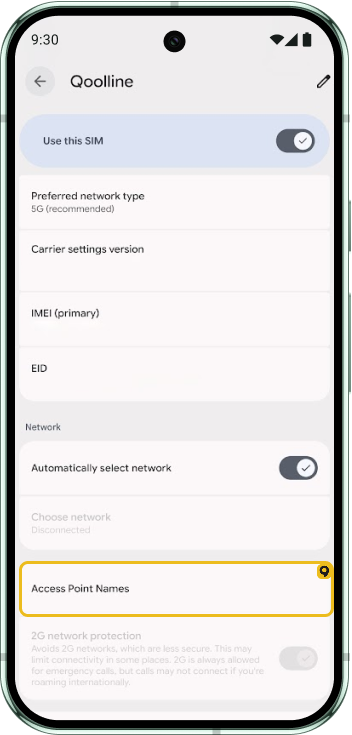
1. Open Settings > Connections > Mobile Networks (or Network & Internet on Pixel).
2. Select your eSIM plan > Access Point Names (APN).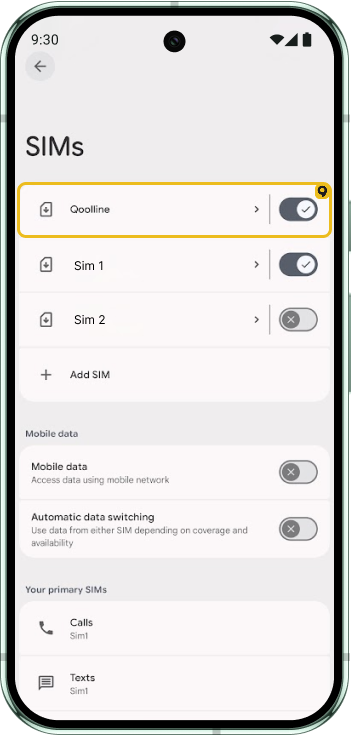
3. Tap Menu > New APN.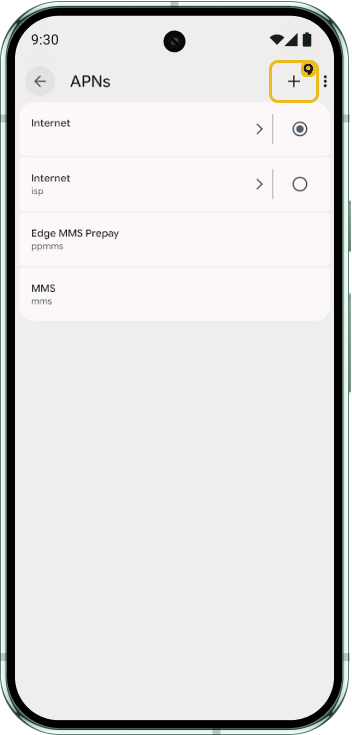
4. In the APN field, enter: globaldata.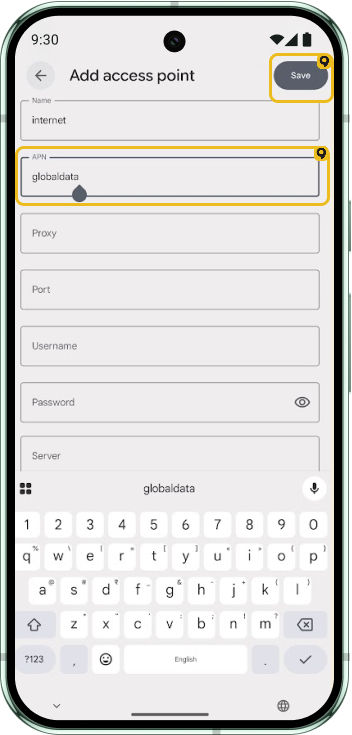
5. Delete any username or password fields if filled.
6. Save and select the new APN.
5. Reset the Data Connection
Try resetting the network connection:
1. Enable Airplane Mode for 30 seconds.
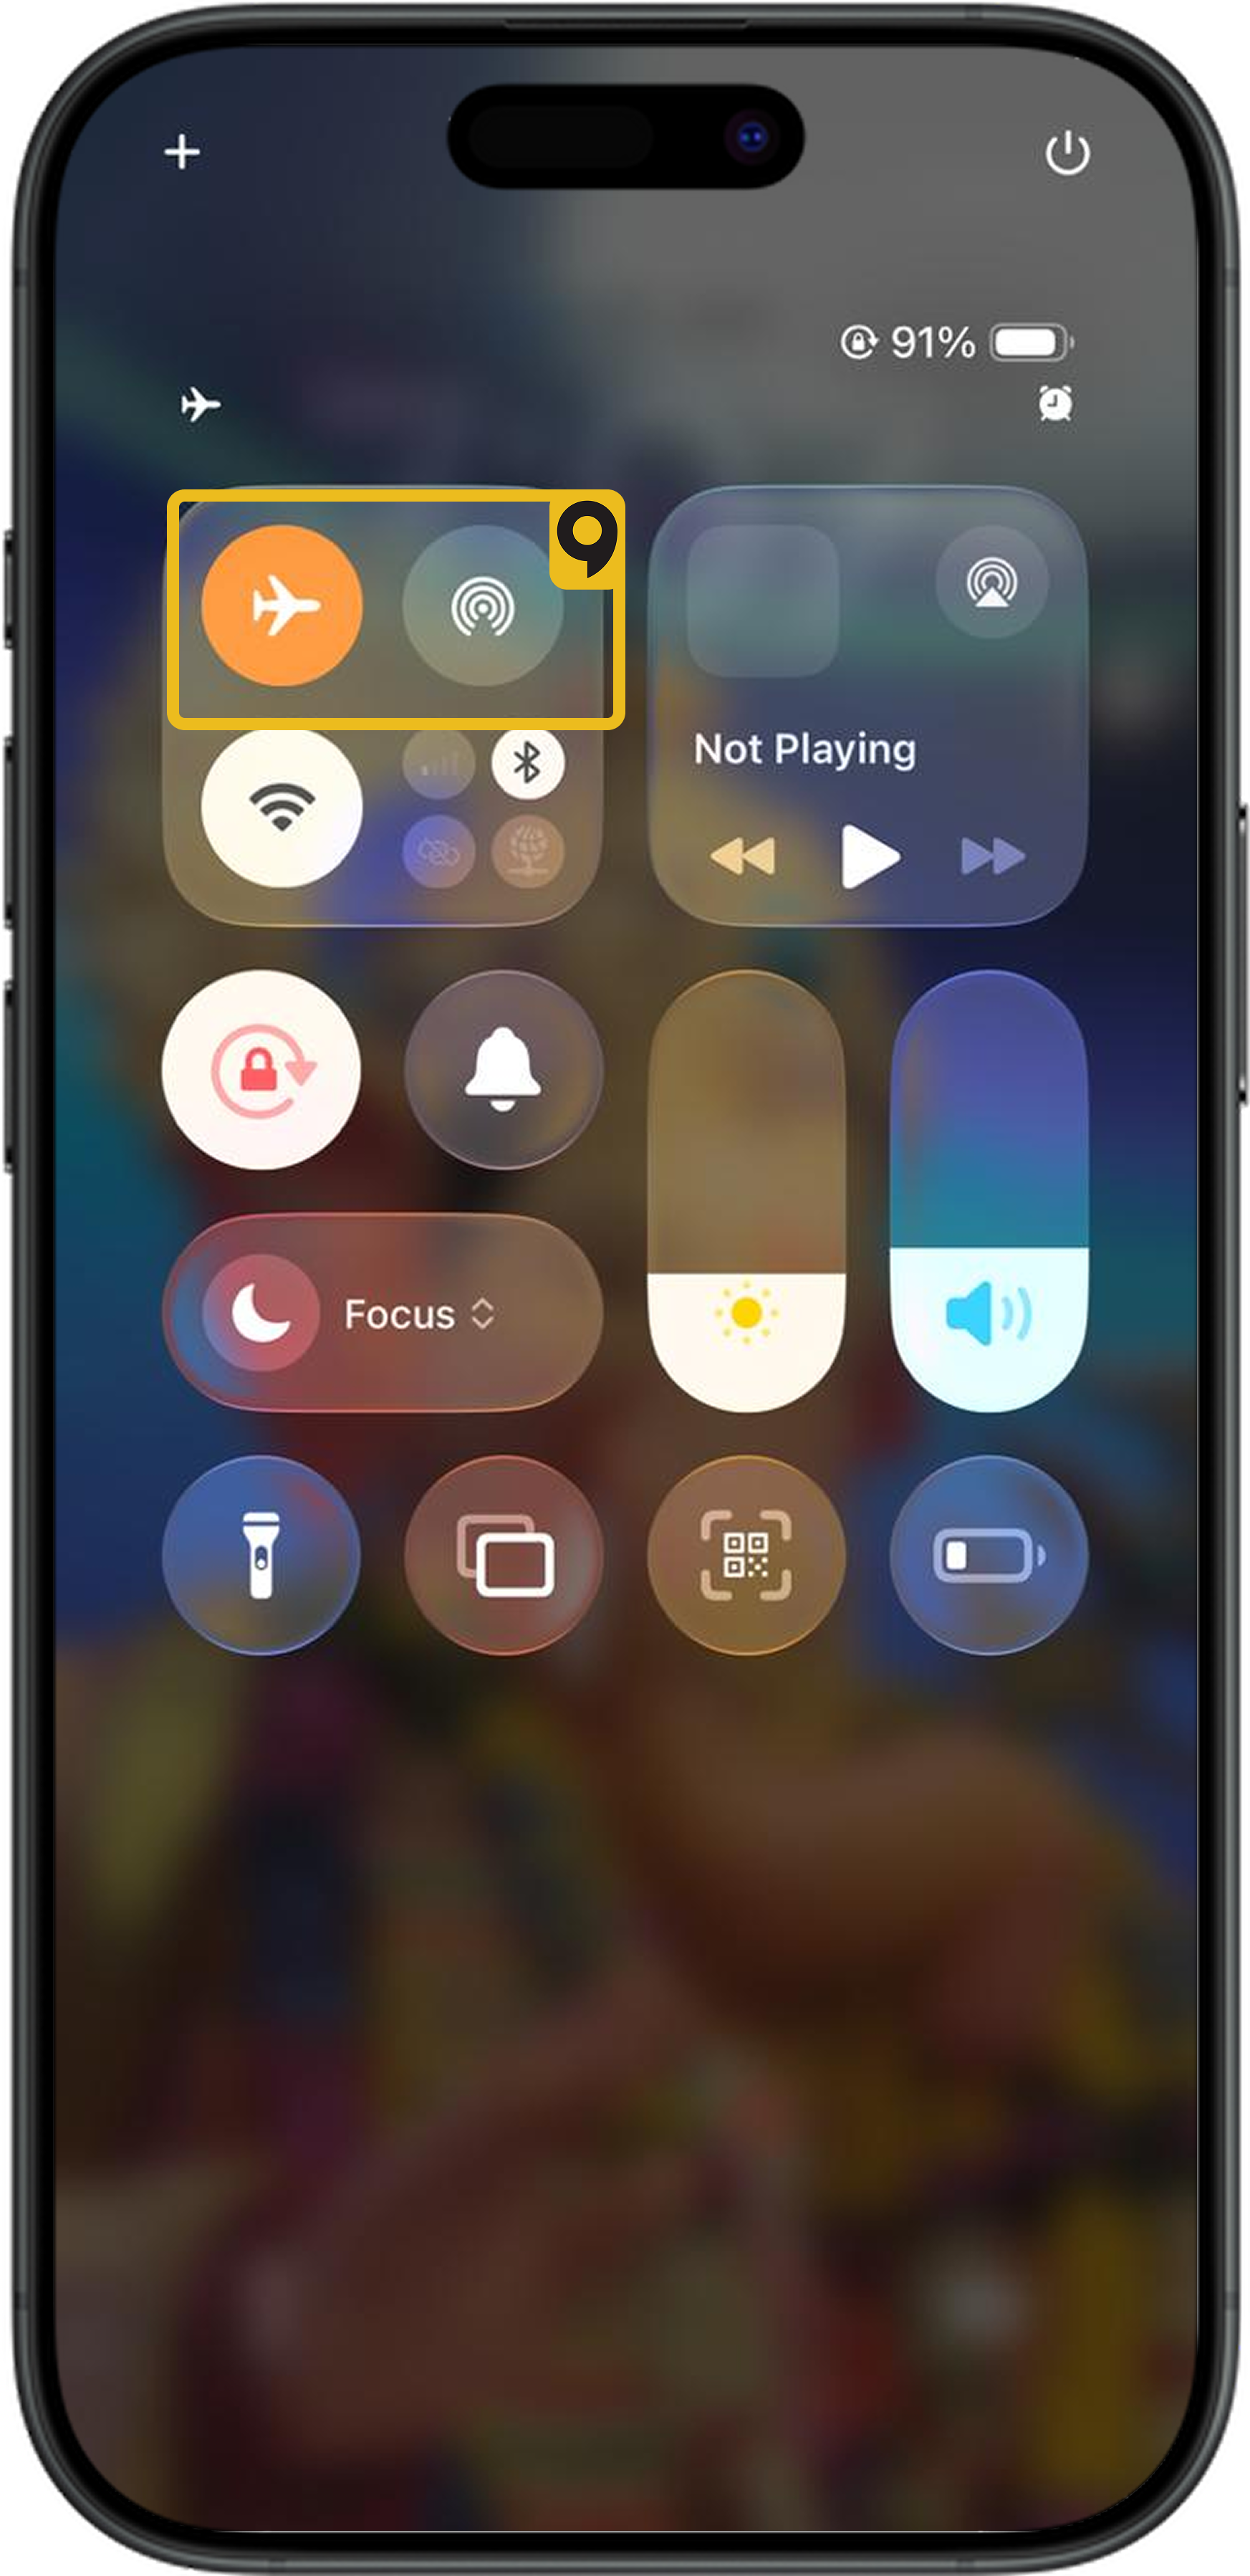
2. Turn off Airplane Mode to reconnect to the network.

3. Wait up to 15 minutes for the eSIM to authenticate and connect to 4G LTE or 5G.
6. Manually Select a Network
If resetting doesn’t work, you may need to select a network manually:
• Apple iOS (iPhone):
1. Go to Settings > Cellular.
2. Select your eSIM plan under Cellular Plans.
3. Tap Network Selection.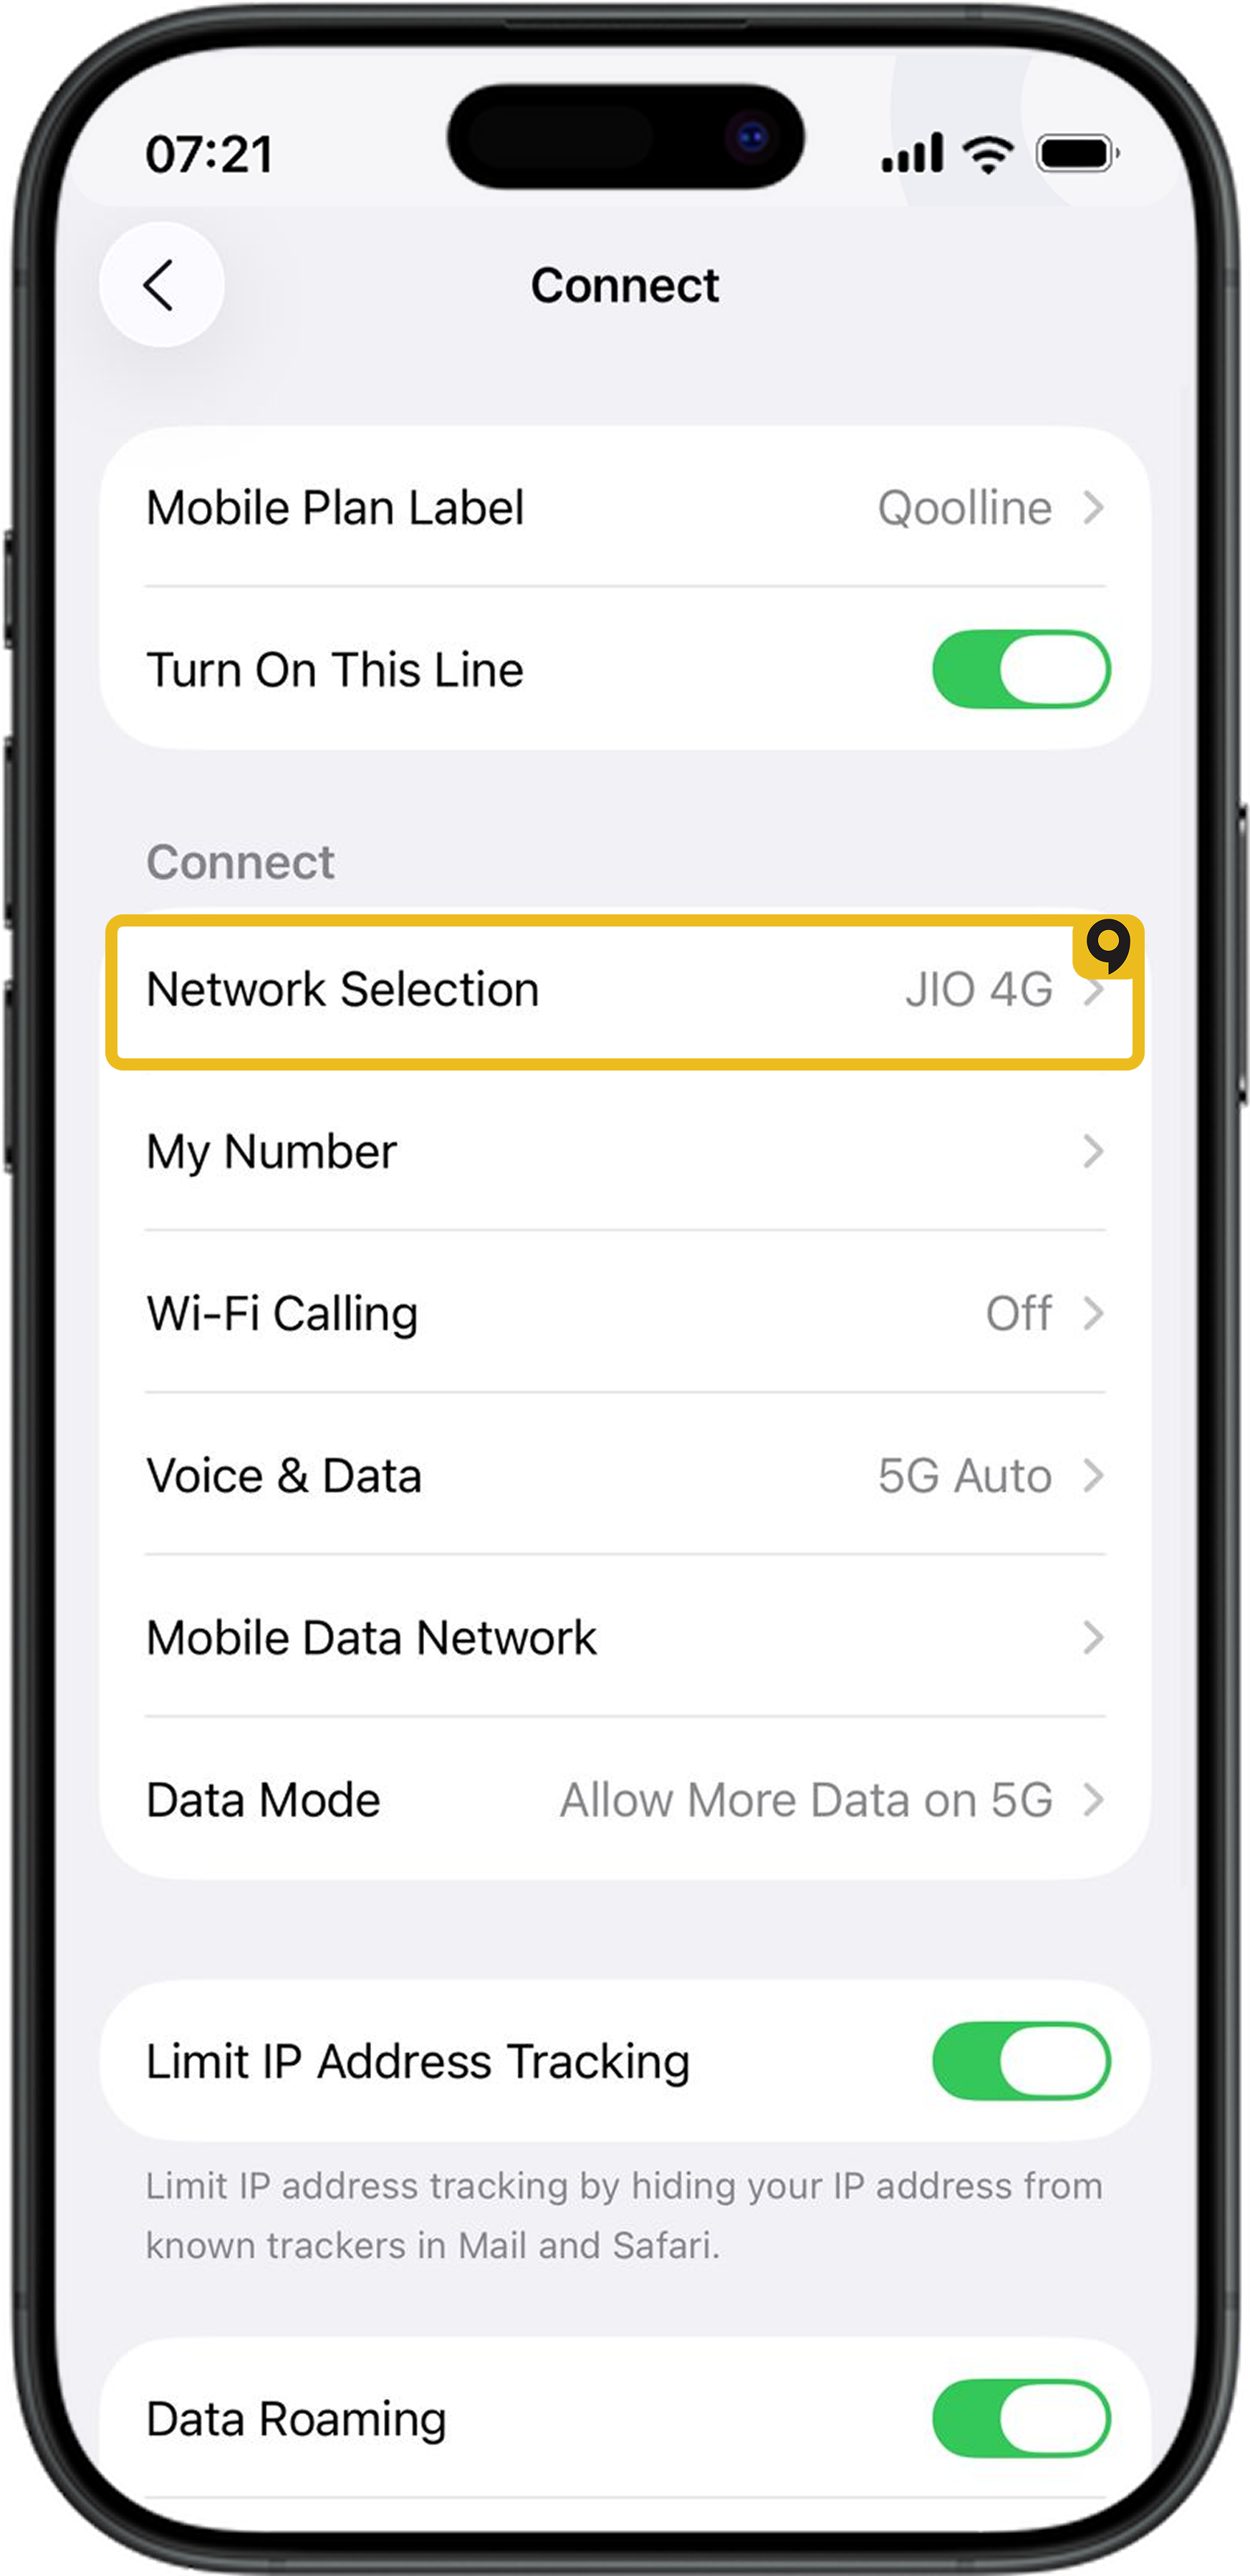
4. Switch Automatic to Off and wait for the list of available networks.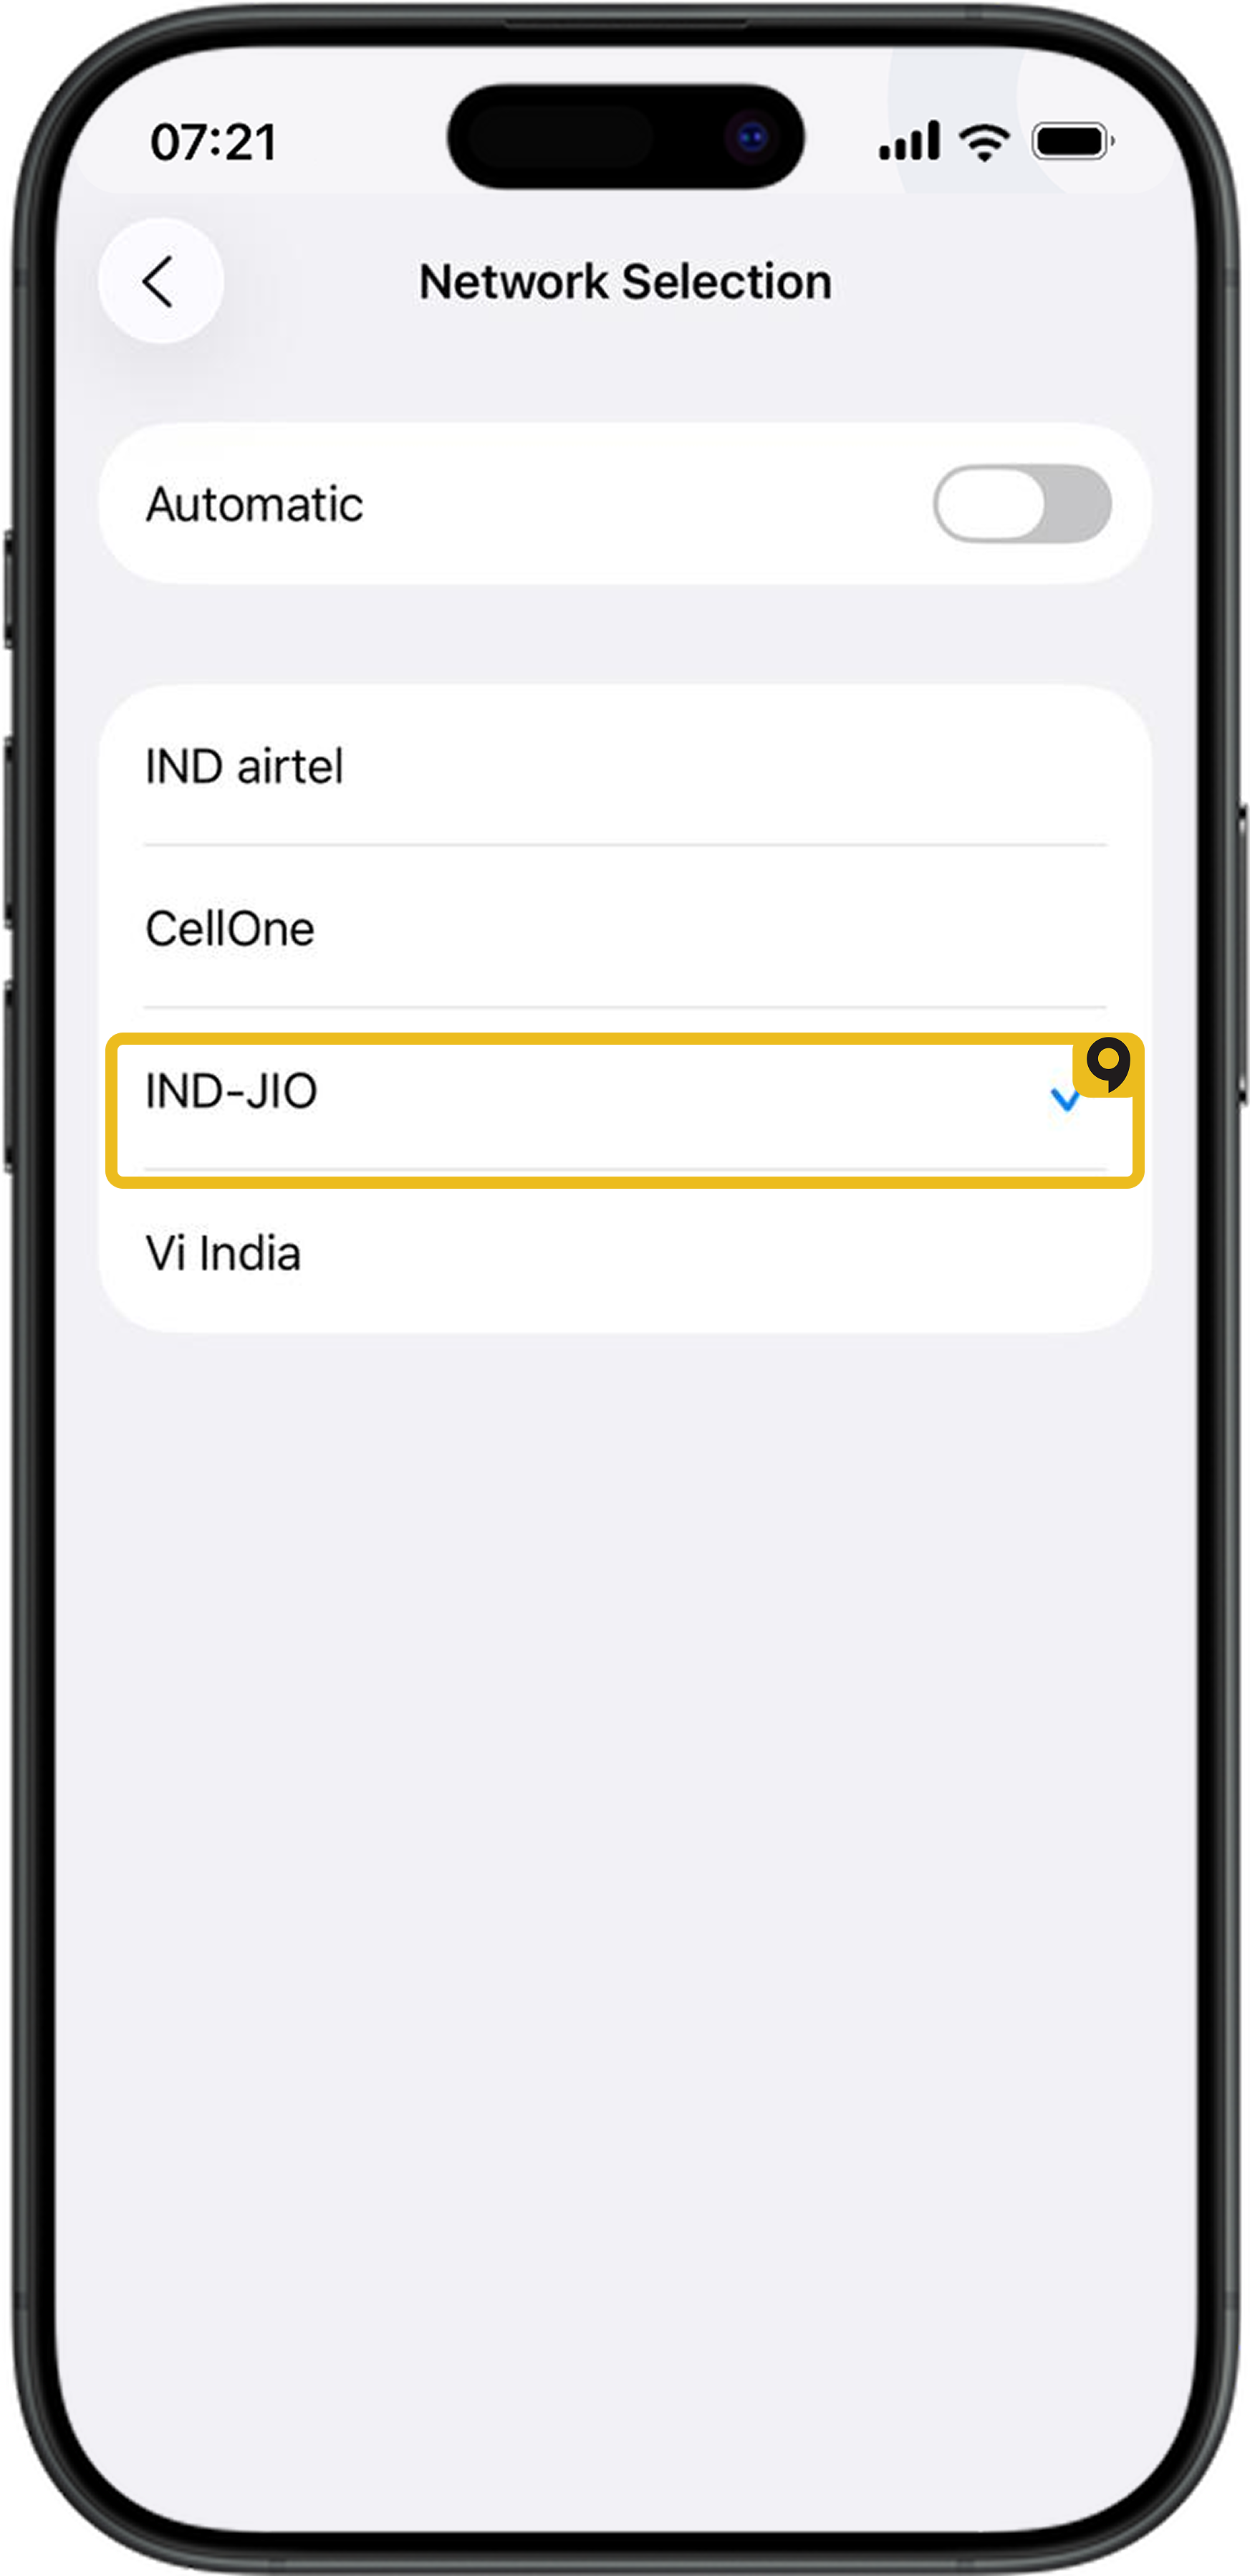
5. Manually select a network and wait for the signal status to update.
6. After connecting, switch Automatic back to On.
If you need help choosing the best network, please contact Qoolline support for advice.
Still No Data Connection?
If the above steps do not resolve the issue, you may be in an area without service or experiencing network disruptions beyond our control. We recommend:
• Leaving Network Selection set to Automatic so your device continues to search for a signal.
• Submitting a support request for further assistance.
Experiencing "Cellular Plans Cannot be Added" Error on Qoolline eSIM? Here’s How to Fix It
Learn how to resolve the "Cellular Plans From This Carrier Cannot be Added" error on your iPhone with simple troubleshooting steps for your Qoolline eSIM.
Quick Fix for 'Unable to Complete Cellular Plan Change' Error on Qoolline eSIM
Learn how to resolve the "Unable to Complete Cellular Plan Change" error for your Qoolline eSIM on iOS with quick, effective troubleshooting steps.
"This Code is No Longer Valid" Error: Quick Solutions for Qoolline eSIM Setup
Learn how to troubleshoot and fix the "This code is no longer valid" error when adding a Qoolline eSIM, with easy steps to ensure a smooth setup.


